OBLAC Drives App
Obtaining the App
The OBLAC Drives App is available free of charge and can be run on a Windows or Linux PC.
Note: Using the OBLAC Drives App is recommended for most users.
If any issues are encountered with the App, refer to the Troubleshooting section.
System Requirements
Windows 10/11 or Ubuntu 22.04 (or later versions) are recommended. Refer to Figure 1 - Npcap Setup Installation Options below for the correct boxes to be checked.
Important:To run the OBLAC Drives Windows App, the Npcap packet capture library must be installed. Under Npcap's free licensing model, the standard (free) version is typically limited to installation on up to five systems. Npcap can be downloaded from the Npcap Web site. Refer to Figure 1 - Npcap Setup Installation Options for the correct boxes to be checked.
Whe using Linux, Ubuntu 22.04 is necessary due to a specific OS library that is required.
Note: If Wireshark was installed previously, Npcap must be removed and installed again as Wireshark automatically installs it without the WinPcap API compatible mode turned off.
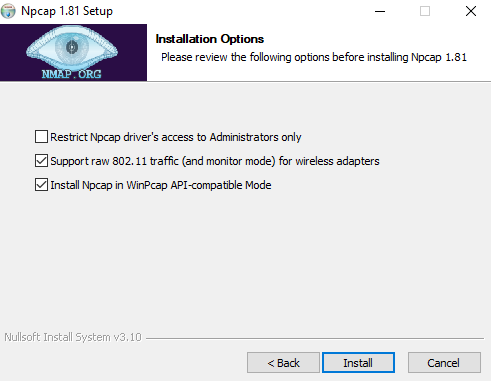
Figure 1 - Npcap Setup Installation Options
Downloading and Installing the App
To install the App, download one of the setup files below:
Download OBLAC Drives Windows (.exe)
Download OBLAC Drives Linux (.deb)
To find all OBLAC Drives versions and bundle files for installing OBLAC Drives on OBLAC Boxes, go to: OBLAC Drives Bundles.
-
On Windows, the application is installed in the user's home directory under AppData\Local\oblac-drives.
-
On Linux, the application is placed in /usr/lib/oblac-drives.
Installing a newer release automatically removes the existing version before installing the new one, allowing users to upgrade - or even downgrade - if needed.
Starting the Application using the EtherCAT Protocol / Connecting to your Device
Follow the procedure below to start the OBLAC Drives App and connect to your device:
1. Connect one or several Synapticon drives - or motors - to your computer’s LAN port and power them up.
2. Start the application by double clicking on the respective icon.
3. In the window displayed, select the protocol for the devices that are to be connected. By default, EtherCAT is selected. Select the network card of the connected device. If there is only one (wired) network card, it is selected by default. If your network card does not appear in the list, switch to expert mode and manually enter the MAC address of your network adapter.

4. Click START THE MASTER PROCESS for communication to be established with your drives.
5. Once the process has started in the background, the App automatically proceeds to the next step and connects to your devices.
6. After a few seconds, a list of connected devices is displayed.
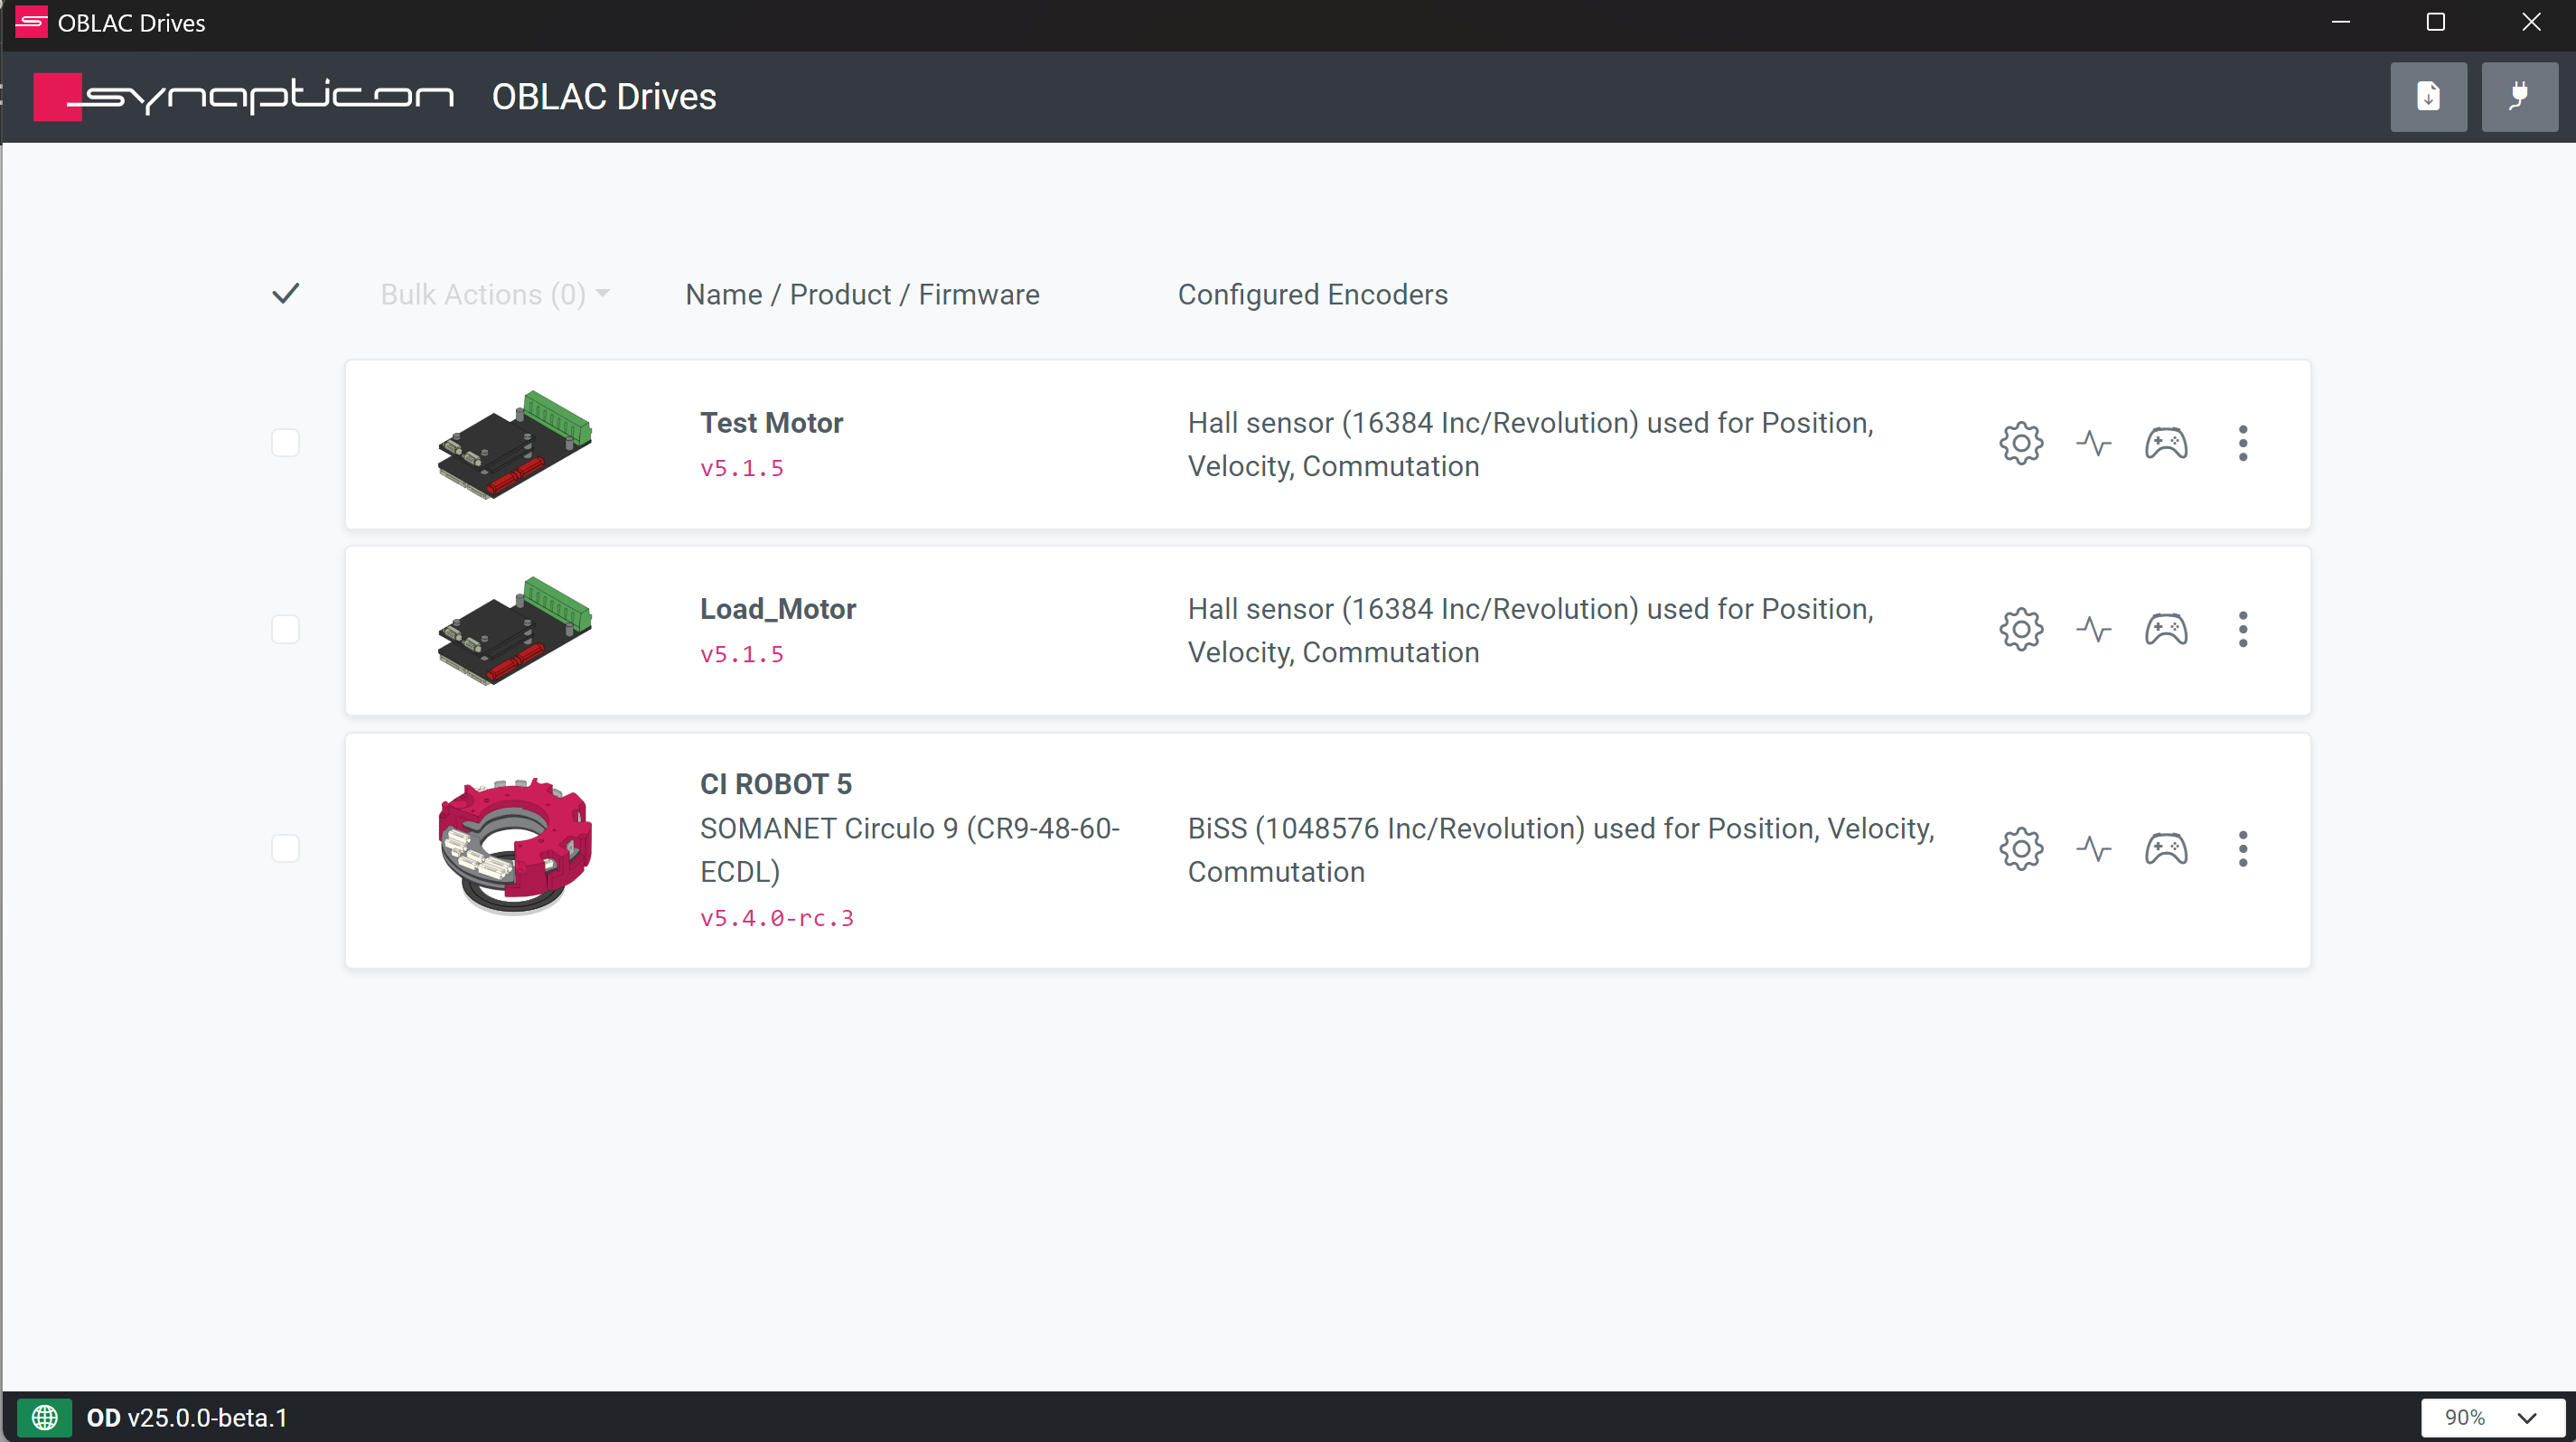
7. Click on the device desired to start commissioning, tuning, testing, getting logs, or updating firmware.
Network Permissions
When the application starts, it prompts for Windows network permissions, which you should grant.
The following ports must be available:
-
63524: For request/response messages
-
63525: For publish/subscribe messages
-
63526: For the HTTP API
Network Adapter
Different Ethernet adapters (chipsets) can exhibit varying performance and reliability characteristics. If you are experiencing issues related to your network adapter, contact support. Synapticon can recommend models that have consistently demonstrated good performance and reliability.
Note: TwinCAT installed on the same machine occasionally misconfigures the adapters. A reinstallation of the driver can fix this.